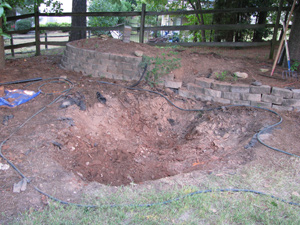
It seemed to start off so easy. Simply drain and remove the old preformed liner pond then mark the new location, put some stakes in the ground and run string around the perimeter, and take a few measurements. Then just dig.
First glance at reality
Using a string level to get a measurement of depth around the new pond perimeter I found my yard had an 8 inch difference in height from one corner to another. Now would have been a good time to call in the bobcat and excavator. But the wife thought that $500-$600 was a lot to pay to have someone come dig a hole. And hell, I need the exercise. Should have probably started by leveling off everything but I decided to start the deep digging portion.
 The first 6-12 inches were easy. I set an 8×10 tarp near the hole and threw good dirt toward one end, rocks and other debris toward the other. Note, 8x10x4 was my desired depth, how much dirt/rocks can that be?(Hint, compacted dirt is much more voluminous once you unearth it.) After I got those first few inches dug I stepped out of the hole and saw the shape of my new pond. It was rectangular but I like a more formal look and was pleased.
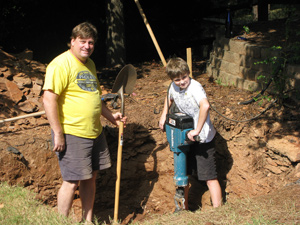
 The next two inches were dug with a heavy metal digging bar($35) and pick-axe. At this point I went and rented a jackhammer from Lowes. ($150 for the weekend). Thought I could plow right through the rock, shale, and hardened clay in a weekend, but I only got about six more inches. Jack hammers are heavy and very tiring for an old man of 47 to use.
So the next weekend I went to the rental center at Home Depot and rented the same hammer for about $30 less for the weekend and managed another 8-9 inches. Finally a long weekend so I was able to rent the jackhammer for 3 days and get down to 3’2″ at my deepest spot. I ran into one bit of rock that was so hard that I could not even get the hammer bit to chip away at it so I now have a plant shelf that is 8 x2 feet wide at the 1’6″ depth. This also provides a nice step out of the hole.
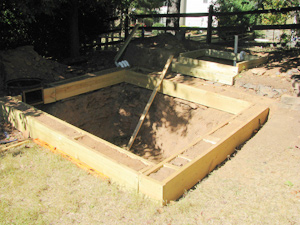
 During the 4 weeks of digging I had unearthed about 8 tons of dirt and covered two 8×10 tarps and have a bit of a rock collection going (none of which are attractive enough to use for anything but fill. I decided to deepen my pond by going upward. At first I thought I would use 6×6 timbers around the border which would get me closer to my 4′ depth. So a trip to the hardware store was in order. I then realized I like the look of an 8×8 better, but I can not lift an 8x8x12 beam. So I wander over to the pressure treated pine and see beautiful 2x10x12s freshly arrived. So I do some quick calculations based on my hole size and buy 4 2x10x8 and 4 2x10x12s. Thinking I am building a box in a box.
My hole is roughly 8×9 feet at this point so to get a nice box in box I should have bought all 12′ lengths. But I manged to piece it together such that I had a 12″ perimeter around my hole. Sure my dug out edges were not perfectly strait and some went under the inner box, but I had joined my inner and outer boxes with studs about every 3 feet so I had plans to fill it in and all would be hidden under the liner. I did reinforce the back fill with a layer of weed fabric to prevent cave ins. I also had the foresight to stick some of the plumbing into the box frame so I could bury it (without testing for leaks first – you see where I am going?).
To recap – Dig hole with shovels, pick axe, and jack hammer over 5 weekends, about 40 hours and $400+or- for rentals. Lost 7 pounds of flesh. Create ledge above ground using pressure treated wood and back fill for stability. Another 2 – 3 days with cost of lumber and screws and hole saws (for plumbing). Insert plumbing and back fill edges for nice uniform raised area around pond. Were now up to 4′ at deepest point with unplanned plant shelf at 2’4″ depth. There is a pile of dirt about 5 feet tall taking up an area roughly 15×10 next to my pond.
The wife also wouldn’t let me bring in a dumpster ($300 saved) to haul away that dirt so I spent several evenings and weekends distributing it into flowerbeds and created a nice level 20×10 area behind the pond for future development.
Due to the blown budget I also decided to build a bog filter above my pond instead of buying a bead filter. So I dig out another 4x5x2 hole and shape it with lumber. This digging was easier since it is where my old upper preform liner sat before. Plumbing was inserted to feed the bog and a bottom shower drain was inserted so I have a way to drain the bog of dirty water. Back filled and stabilized ready for liner.
At this point I can make changes to my original vision , plan the edging and rocks in the waterfall, envision where plants will sit, and hope the bog will clean the water enough to keep koi some day. Pond building is not an exact science. [UPDATE: The bog must come after mechanical filtration. Otherwise the anaerobic bacteria buildup will kill fish. I eventually removed the bog rocks and now use it as a veggie filter.]

