Reducing pump flow rate

I was curious if there was a practical way to reduce the flow rate of my pump without damage to the pump. So I asked the folks that make my pump (PerformancePro Artesian 2 speed). Here is their response:

“Hello thank you for choosing PerformancePro Pumps and for your inquiry. I suggest you simply install a ball valve on your discharge pipe at a location convenient to your purpose. Closing the valve only creates artificial head. The pump is doing less work with less water weight work being done. All PerformancePro Pumps are designed to operate at any point along their performance curve as long as a few gallons per minute flow is maintained to cool the pump.”

So I found the performance curve for my pump. I will have to simulate 10-15 feet of head to reduce it down to 1800-2400 GPH at the lower RPMs. At higher RPMs that level of head has no impact on performance. So I get the best of both speeds without fiddling with the valve. This will give me slower flow for better filtration and hopefully less evaporation loss at the falls. My pump is the gold line on the chart below. The area in Pink is what I am aiming for.

pump curve reducing flow rates

Posted in Pond Building, Resources, Troubleshooting | Comments Off on Reducing pump flow rate

Koi Death – Bacterial infection

In sad news today I lost another fish due to bacterial infection. I suspect the bog was harboring anerobic bacterias and other nasties. I tried a treatment of anti-biotics but he died before the treatment had time to work. Below is an image of the final stages.

sick_koi

Posted in Troubleshooting | Comments Off on Koi Death – Bacterial infection

Cleaning out the bog

Today I spent the better part of a hot and humid Sunday morning cleaning out the bog. I removed all the gravel, rocks, and a gross layer of muck. Then washed down the liner and filled and drained it again to get rid of any remaining bad bacteria and dirty water.

Visited my friends at Wakoola to pick up some Hyacinth and Anacaris plants for the former bog.

Posted in Gardening, Pond Building, Pond News, Troubleshooting | Comments Off on Cleaning out the bog

Weekend pond and garden to do list

There are always a few chores associated with owning a pond. If your systems are easily accessed and you have planned well the maintenance is not hard and can be enjoyable. I consider it part of my exercise routine.

– Clean and drain the new filter box – done. Wasn’t too bad since I had only started it up on Wednesday. changed about 150 gallons of my 1600 gallons. Added Amquel Plus which fights chlorine, ammonia, and supposedly nitrites/nitrates.
– Clean small filter pads – done (gross)
– Back fill dirt around the filter box – done
– Add inner piping to to filter box to control water flow – done. Added two elbows so I can evenly distribute the water over the two outlets. $15 for two male threaded connectors and two street elbows.
– Purchase containers for replanting bog plants. done. 7 containers x $2.50.
– Test water – Done. PH 8.2, Ammonia 0, Nitrite 0.1, Nitrate 0.1.
– Repair broken tile on patio – Done.
– Remove gravel, rocks, & plants from bog and replant plants in containers. Inspect structure and lining. Figure out some kind of shelf for plants to sit on in the bog area. Bought Hyacinth and anacaris instead of building a shelf. Moved old plants to big plastic bin for now.
– spread dirt pile. done – using it to redirect water flow when it rains. Can also use it for a planting bed now. Will need to mulch it or cover with rocks or something so it doesn’t become a mud pit.
– Type up instructions for the kids next door to feed the fish when I go on vacation.

Still to do:
– Shop for plants to disguise the filter box or put rocks around it, or both. Thinking something evergreen like the hemlocks.
– redo back side of raised bed to replace rocks with retaining wall blocks.
– dig trench for intake side of pump plumbing and redo piping.
– research electrical box options. considering getting switched outlets so I can turn off some items at the switch.

NOTE: as you plan your ponds piping you can use unions to connect bits of pipe that might need to be removed or changed frequently. Else use male & female connectors for possible future redesigns. or just plan very well from start if you are experienced with ponds.

Posted in Gardening, Pond budget, Pond Building, Pond News | Comments Off on Weekend pond and garden to do list

Eleven products for clearer pond water

Here are the top Eleven things you can use in/for your pond to keep your water clearer. Sooner or later every pond owner will try some or all of them.

The Pump is the major player in your water circulation system. Moving water will control some pollutants which lead to algae blooms and help remove debris into your filters. Flow rate and Turn over volume plays a key role in moving the water adequately through the filtration so that biological nitrification and mechanical filtration. Too much water movement may keep debris stirred up so have some still areas where debris can settle.
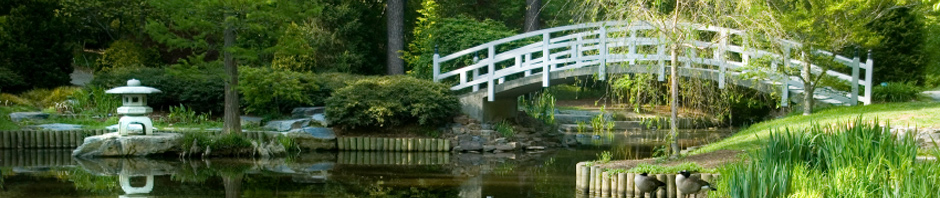
For large bodies of water a natural stream can be the source of water movement.

Filters – You can never have enough filtration in a closed recirculating system. Removing the debris, ammonia, Nitrites, and other harmful substances is the primary role of the filters in your pond. By getting the particles out of your pond you should be able to see your fish or plants better. You can use multiple stages and various types of filters to achieve differing results. Size your filter for proper performance and flow rate. Maintaining filters is a necessity for water clarity, dirty filters = dirty water.

UV sterilizer – Since nature will provide algae, bacteria, and other microscopic debris we have to fight it with a powerful UV light which disrupts the cellular structure and kills the offending contaminants. Size, power, location, and flow rate through the filter all play a role in how well this tool works. In a larger body of water you may not need to turn it on often. Under sizing or purchasing poorly engineered UV’s will not give you the bacterial fighting + clarifying aspect you would hope for. Rule of thumb is maximum 40GPH per Watt for clarifying or 15GPH per watt for fighting protozoa and difficult bacteria.

Drains and Skimmers – Connected to your pump or via gravity flows these devices in your pond will remove the bulk of the debris and toxins in the pond. Drains should be researched to make sure the one you are considering is adequate for the square footage of your pond. Skimmers are critical for removing leaves and items falling into the pond before the fish begin shredding them or they fall to the bottom to rot and cause other issues.

Aeration – Good for healthy fish and also helps colonize good bacteria. Seems to reduce algae too. It can disrupt the water surface and hide your fish from predators overhead too.

Bacteria – Often overlooked, bacteria plays a critical role in your pond’s health. It is nitrifying bacteria that sticks to the walls of every pipe, walls, and filter pads that cleans the water. You can give nature a boost by adding in additional bacteria. You may spike your nitrates for a while after adding them but a few plants or the next algae bloom will balance things out as long as your bacteria can colonize and convert wastes.

Algaefix and Flocculants – If fighting algae blooms and are growing impatient with the natural cycle or you need to show off your fish at a backyard party, Algaefix will kill most water born algae in a few hours. A flocculant will bind small particles and help the fall to the floor of your pond where hopefully your drains can remove the debris. Do not leave dead algae in the pond, it will merely feed the next bloom.

Koi clay – Also known as bentonite / montmorillonite clay, is clay that contains the most minerals and trace elements not found in our tap water or wells. I am not sure why this promotes water clarity other than improving hardness and encouraging plant growth but users swear by it. I have ordered some and will be trying it soon. It only takes about a spoonfull per 1000 gallons.

Food – How often and how much you feed your fish makes a difference in the amount of fish waste and uneaten food debris that is in your pond. Quality of food can also play a role. Feed your fish the best food you can and limit your feeding to what they will eat in a few minutes 2-3 times per day. Use your skimmers and drains to get rid of uneaten food.

Plants – Plants in the pond shed leaves as well as play a role in the nitrification cycle. A lot of plant debris from dying plants maybe contributing to algae blooms, while healthy eating plants will remove nitrates and nitrites. Plants around the pond and nearby trees will more than likely add to debris rather than help. a large tree over the pond can provide some shade so algae does not get as much sunlight. Floating plants will do this more effectively but may not be feasible with hungry fish.

Time – it can take months to establish a good biological cycle in a pond. Constantly adding chemicals or flow changes may lead to less than ideal water. Give the pond a few months to settle before making major changes.

Posted in Pond Building, Resources, Troubleshooting | Comments Off on Eleven products for clearer pond water

Pond Plumbing Diagram

I can’t sleep so why not draw a diagram of my pond and its plumbing. Some of this is still in the works. I currently only have one pump which feeds from bottom drain and skimmer and returns some water to the filter and some to the jets. The filter discharges into the veggie filter which flows over the waterfall back to the main pond. I can slow my filter flow rate by using ball valves. I can also shut off skimmer during feeding. all pipe is 2 inches. Not shown are check valves before the pump and before the 3 way valve, and a drain line from the former bog to the left side of the pond. The raised bed sits about 2.5 feet above the main pond and the filter outlet is another 1 foot higher.

my Koi Pond Diagram

Equipment:
EPDM 40 Mil Liner
Retrofit bottom drain plumbed to 2″ bulkhead at 6″ below water level
Danner 5000 Skimmer
PerformancePro Artesan 2 speed pump
Waterco Multicyclone 50 Prefilter
3 way Jandy valve
Shipping bin filter with Japanese mats
PVC pipe, 4 Ball Valves, check valves, several unions
Pondmaster 40 airpump

UPDATE: Here is a revision after some changes:

Posted in Gardening, Pond Building | Tagged , , | Comments Off on Pond Plumbing Diagram

Currently reading – Modern Nishikigoi

Currently perusing a copy of modern_nishikigoi
Modern Nishikigoi: Basic Varieties and Unique Koi
. This book is great for the beginning koi enthusiast. It describes in great detail the 3 most popular types of koi (Showa, Taisho Sanke, Kuhaku) and describes characteristics of many others. There are types of koi in this book that that are possibly now extinct or are not being bred for the US market. The book is loaded with photographs of good specimens of each type. The descriptions illustrate what qualities to look for as well as those that are less desirable (from a judging standpoint). There is a great deal of knowledge about how koi are judged and ranked within each of the major categories. The book was published in 1986 so may be a bit out of date but you can see how modern koi have evolved even from 30 years ago. There are still some copies on Amazon (click the book cover) if you are interested. I may list mine or save it to give away in a contest later.

UPDATE: My copy is now listed on Amazon.com for $32. If you wish to buy it direct from me I do accept paypal and will ship within the USA. If it doesn’t sell by Christmas 2011, I may offer it in a contest in 2012.

Posted in Resources, Wandering | Comments Off on Currently reading – Modern Nishikigoi

New Filter Installation

So you saw the plan a couple of posts ago (if not see below). That was the Plan, here is the reality.

Sunday morning started digging hole for the filter. 48 x 24 x 19 deep. It took about 4 hours with a bit of refining at the end to get the hole slightly pitching forward and toward the inlet so I can use it to drain also. Another 2 hours to dig the trench for the piping behind the raised bed. Note: a pick axe is great tool for trenching if soil is not rock hard, but it will strain your back.

Monday (JULY 4) started running the piping from filter to Jandy Valve to approximate location of the pumps new home. I moved the pump closer to the block wall of the raised bed and back toward neighbors fence. As I toiled, I looked at the return line plumbing pieces I had and found bits I could reuse. I marked where to cut those with a big green crayon. I glued unions to the base of the filter and two sides of the jandy valve so I could remove the pipe works if necessary. 4 hours with a couple of long breaks cause it was freakin’ hot, 94 Degrees.

Tuesday evening – Turned off the pump and moved it to its new home. Spent two hours cutting pipe and gluing fittings to create the new plumbing system for intake and return to the pond. I was able to reuse a couple of the ball valve assemblies as well as the check valve assemblies. I had just enough pipe to do the job without an extra trip to home depot. I put a couple of unions in strategic places that will allow me to expand the system when I get my UV or if I decide to route the plumbing differently in the future. I added a shut off for the jet return side. 2 hours work and whole lotta sweat.

Wednesday morning – Looked at all the unions and made sure they were attached, and checked to make sure the valves were open on the outtake and intake sides. Primed the pump and turned it on. It didn’t quite fill the waterco multicyclone prefilter before the leaf basket went dry so had to re-prime and start again. I had one major leak at a union where the male thread went into the union. So I shut off the pump, loosened the union, took the assembly off the male threaded connector, applied a bunch of teflon tape, reassembled and tightend everything down good. I forgot to tighten the union on the prefilter so got a bit of a blast of water from that. after tightening all that down again, I turned on the pump and voila, no leaks, and water flowed into the big new filter. It took a few minutes to fill that big tank and the pads floated right up with the water. So I grabbed a bag of crushed coral from the bog and put it on top of them.

The pond has been circulating about an hour and I can see some improvement in water clarity. The pond was really messy this morning since I stirred a bunch of gunk up in the bog when restarting. I am sure I will see big improvements later today.

Still to do:
– Finish Jet outlet plumbing, bury pipe.
– back fill pipe trenches and around filter
– disguise the top part of the big black filter box on my side and neighbors side. I have rock left over from the water fall construction.
– combine and simplify intake side plumbing. I have a temporary zig-zag pipe work working now.
– finish landscaping to help hide new pipe work. I may even paint the pipe brown so it doesn’t show so much.

Posted in Pond Building, Troubleshooting | Tagged , , , | Comments Off on New Filter Installation

Visitor Map

Thanks to all those who visit esearing.com/pond and are sharing in my adventure of pond and fish ownership. I am trying not to repeat information that is out there and easily found, but rather provide a resource for pond ownership that fills in the gaps you only get from experience. I know first hand how overwhelming the amount of information is as well as the amount of info that seems to be missing. It seems those with something to sell rarely experience the wide array of pond issues that we mere owners experience. One product rarely fixes the issue.

Below is a map of the last few weeks visitors taken from my site statistics. I am amazed by how many people all over the world find me via google searches or other resources.
esearing.com/pond visitor map

The most common queries generally lead to my articles about:
multicyclone prefilter
how to remove black foam from hands
pond filtration
rock on a roll
skimmer leaks
pump cavitation

If you have any specific questions, please use the Contact Form and send me an email. I will be happy to answer as best I can or help you find a resource that meets your needs. Thanks for visiting esearing.com/pond. Happy Ponding!

Posted in Resources, Wandering | Comments Off on Visitor Map

3 way Jandy valve

I purchased a 3 way Jandy valve ($50) for the new plumbing. When you get the valve it only allows you to divert water to one of 2 90 degree outlets. However if you remove the handle you will notice 2 pins which control how far you can turn the handle. Remove the pins, reattach the handle, and put the handle in the middle outlet position so the closing valve cover is at the side with no outlet. Now you can put the pins back in at the farthest holes from the center which are usually labeled left90 and right 90. This will allow the valve the most potential pathways for flow.

Posted in Pond budget, Pond Building, Resources | Comments Off on 3 way Jandy valve