The new Pond – The budget part II

Here is a breakdown from the reciepts collected over the 10 weeks I built the pond. Still not finished and I’m sure I missed a few items. Plants is the next big expense and the final edging material above grade may be a bit costly.

Tools, String, level, misc $ 139
Skimmer (warehouse sale) $ 200
20×20 liner (craigslist) $ 150
Jackhammer rental 5 days $ 430
Wood, plumbing, misc $ 285.07
Wood, tools, plumbing $ 35.74
Pump, wiring (ordered online) $ 703.48
liner, underlayment, bulkheads,tape $ 375.39
eductor jets $ 73
Plumbing, plastic grate $ 63.71
Tvalves, bottom drain, spring valves $ 181.85
PVC Cement/Union $ 15.94
More PVC $ 8.54
bulkhead, nonking tubing/fittings, additives $ 101.52
more pvc plumbing $ 15.25
Rock for edging & waterfall, delivery $ 498.96
plants $ TBD
TOTAL $ 3277.45
Posted in Pond 2010, Pond budget | Comments Off on The new Pond – The budget part II

The new Pond – The Liner

The liner is a major component in any pond whether it be a preformed shell, concrete, or rubber lining. I had read a great deal about EPDM liners and how to size them for the pond. I was most concerned about getting too small of a liner so I added 2-3 feet in all directions.

For the lower main pond 8x9xavg3 I purchased a 20×20 liner from a fellow off craigslist. The invoice showed it was an EPDM liner and the box was unopened. When I unrolled the liner I found out it was seamed in the middle. I was not able to find any negative reviews of professionally seamed liners. I saved about $75 off full retail for this liner and did not have to pay shipping or sales tax.

For the upper bog and falls I went to my local Pond supply store (Wakoola) and purchased a 10×15 liner which was far larger than I needed but allowed me some options for the bog design. I also purchased all the underlayment I would need for both sections of the pond. My estimates for the underlayment was a mere 20 square feet larger than I needed. I also purchased some sticky 2 sided seam tape at $5/foot to connect the bog liner and pond liner underneath where they overlapped.

The underlayment was cut to fit neatly inside all four sides and even the bottoms of my bog and main pond to help protect from rocks and roots. The main pond liner went in much easier than I thought but due to the rectangular shape I have several folds at the corners. I ran it up to the full height of the water falls knowing I would put heavy rocks on it. The upper bog liner was placed so that it overlayed the lower and acts as a second layer to the water line.

I filled the pond with water, smoothing and shaping the liner as it filled. About 1 foot from the top I cut in my bulkheads for jets and the skimmer. That is a very nerve racking step. Even more nerve racking was putting in a bulkhead near the skimmer for the bottom drain hose. I did not plan for that so I was working in tight quarters and drilling through wood with liner already stretched over it.

After about a week of tinkering and making sure nothing was leaking I began trimming and burying the liner on the outside of the frames. Once my pump was running and waterfall rocks placed I found that my bog would overflow on the backside when running the pump at high speed. So I built it up with 2×2’s and overlayed the bog liner again. Good thing I left a good bit of extra around the edges.

Posted in Pond 2010, Pond Building | Comments Off on The new Pond – The Liner

The Heron

The heron keeps coming back to my pond, looking for more fish. He even got my “Lucky Fish” who survived his prior attacks and several moves and water changes. It appears my heron is not afraid of the floating alligator head.

I thought about having a sign made “Blue Heron Cafe – Closed”. With the new raised pond design I guess I will have to build some sort of fencing. I may try to mimic a Japanese bridge railing.

Other deterrents do not seem to have much effect either. I have heard/read of poor results from others with fake herons, water sprays, and the bamboo noise makers can not keep a determined heron away. There is one contraption that spins a bamboo pole in a circle around your pond, but I don’t think I want to go that route. I may try fine netting too once I have fish.

Posted in Predators | Comments Off on The Heron

The new Pond – Digging the hole

It seemed to start off so easy. Simply drain and remove the old preformed liner pond then mark the new location, put some stakes in the ground and run string around the perimeter, and take a few measurements. Then just dig.

First glance at reality

Using a string level to get a measurement of depth around the new pond perimeter I found my yard had an 8 inch difference in height from one corner to another. Now would have been a good time to call in the bobcat and excavator. But the wife thought that $500-$600 was a lot to pay to have someone come dig a hole. And hell, I need the exercise. Should have probably started by leveling off everything but I decided to start the deep digging portion.

The first 6-12 inches were easy. I set an 8×10 tarp near the hole and threw good dirt toward one end, rocks and other debris toward the other. Note, 8x10x4 was my desired depth, how much dirt/rocks can that be?(Hint, compacted dirt is much more voluminous once you unearth it.) After I got those first few inches dug I stepped out of the hole and saw the shape of my new pond. It was rectangular but I like a more formal look and was pleased.

The next two inches were dug with a heavy metal digging bar($35) and pick-axe.  At this point I went and rented a jackhammer from Lowes. ($150 for the weekend). Thought I could plow right through the rock, shale, and hardened clay in a weekend, but I only got about six more inches. Jack hammers are heavy and very tiring for an old man of 47 to use.

So the next weekend I went to the rental center at Home Depot and rented the same hammer for about $30 less for the weekend and managed another 8-9 inches.  Finally a long weekend so I was able to rent the jackhammer for 3 days and get down to 3’2″ at my deepest spot. I ran into one bit of rock that was so hard that I could not even get the hammer bit to chip away at it so I now have a plant shelf that is 8 x2 feet wide at the 1’6″ depth. This also provides a nice step out of the hole.

During the 4 weeks of digging I had unearthed about 8 tons of dirt and covered two 8×10 tarps and have a bit of a rock collection going (none of which are attractive enough to use for anything but fill. I decided to deepen my pond by going upward. At first I thought I would use 6×6 timbers around the border which would get me closer to my 4′ depth. So a trip to the hardware store was in order. I then  realized I like the look of an 8×8 better, but I can not lift an 8x8x12 beam. So I wander over to the pressure treated pine and see beautiful 2x10x12s freshly arrived. So I do some quick calculations based on my hole size and buy 4 2x10x8 and 4 2x10x12s.  Thinking I am building a box in a box.

My hole is roughly 8×9 feet at this point so to get a nice box in box I should have bought all 12′ lengths. But I manged to piece it together such that I had a 12″ perimeter around my hole. Sure my dug out edges were not perfectly strait and some went under the inner box, but I had joined my inner and outer boxes with studs about every 3 feet so I had plans to fill it in and all would be hidden under the liner. I did reinforce the back fill with a layer of weed fabric to prevent cave ins. I also had the foresight to stick some of the plumbing into the box frame so I could bury it (without testing for leaks first – you see where I am going?).

To recap – Dig hole with shovels, pick axe, and jack hammer over 5 weekends, about 40 hours and $400+or- for rentals. Lost 7 pounds of flesh. Create ledge above ground using pressure treated wood and back fill for stability. Another 2 – 3 days with cost of lumber and screws and hole saws (for plumbing). Insert plumbing and back fill edges for nice uniform raised area around pond. Were now up to 4′ at deepest point with unplanned plant shelf at 2’4″ depth.  There is a pile of dirt about 5 feet tall taking up an area roughly 15×10 next to my pond.

The wife also wouldn’t let me bring in a dumpster ($300 saved) to haul away that dirt so I spent several evenings and weekends distributing it into flowerbeds and created a nice level 20×10 area behind the pond for future development.

Due to the blown budget I also decided to build a bog filter above my pond instead of buying a bead filter. So I dig out another 4x5x2 hole and shape it with lumber. This digging was easier since it is where my old upper preform liner sat before.  Plumbing was inserted to feed the bog and a bottom shower drain was inserted so I have a way to drain the bog of dirty water. Back filled and stabilized ready for liner.

At this point I can make changes to my original vision , plan the edging and rocks in the waterfall, envision where plants will sit, and hope the bog will clean the water enough to keep koi some day. Pond building is not an exact science. [UPDATE: The bog must come after mechanical filtration. Otherwise the anaerobic bacteria buildup will kill fish. I eventually removed the bog rocks and now use it as a veggie filter.]

Posted in Pond 2010, Pond Building | Comments Off on The new Pond – Digging the hole

The new Pond – The budget

Over the last couple of years I had contacted professional landscapers and pond builders to determine the cost of building a naturalized pond. I was shocked with bids that were 15,ooo+ for a little pond 10x12x3. Upon realizing I need to feed my family first I decided I would build the pond myself saving me all the labor costs. I would also have to scale back some of my ideas of using large rocks since I can not lift a couple of tons.

I knew I liked a mix of formal and natural ponds. I read about the products needed to create that perfect low maintenance pond from the experts who had done this before me.  I drew out my plan complete with details about placement of skimmers, pumps, pipes, valves, waterfalls, and jets. I researched each piece of the system and came up with a figure how much it would cost and was pleasantly surprised I could build it myself for about $2500 which included a nice pump and bead filter.

During the summer a local pond supply store was having a clearance sale. I picked up a skimmer box which was far larger capacity than my pond would need. I spent $200 but was quite pleased with myself knowing this skimmer would suck up all the pesky leaves from the bradford pear trees which overhang the area. Unfortunately the rest of the supply store sale was geared to the 200 gallon pond or  massive ponds.

I picked up a 20×20 EPDM liner from a fellow on craigslist for  $150 about 25% -30% off what I would have paid locally. My goal was to build a 10x10x4 foot pond so this was just the right size.

I scoured the internet to find a good deal on the pump I had convinced myself I just had to have. A two speed Performance Pro that circulates from 3000-10000 gallons per hour. <a href=”http:adamsaquatics.com”>adamsaquatics.com</a> had the best price and free shipping and no sales tax. Another $700, but I saved nearly $200 over other local sources.

Tally so far with not the first shovel of dirt overturned ($1050). Just need a little pvc piping and some tools so I am right on budget.

[Buzzer sound] Wrong! – I needed bulk heads, jets, knife valves, unions, elbows, flex pipe, bottom drains, check valves, wyes, connectors, reducers, and a few other odds and ends. Many of the specialty items were $30-$50 each. Unions are $8 each and I used 8 of them. Costs at the local builder supply are about 30%-50% more than what you see on the internet, so if you have the time, order online.

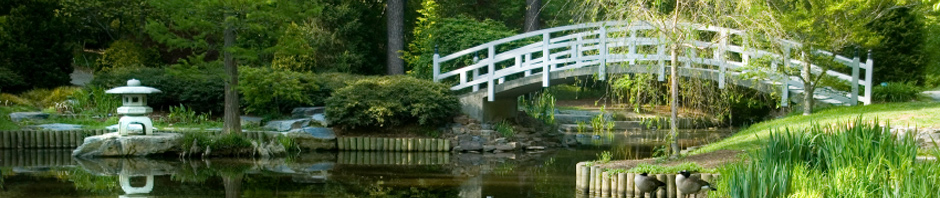
Then came the time to dig the hole. I got down about 1 foot and realized I live on top of a stone mountain. The shale and hardend clay required the rental of a jack hammer for several weekends adding an unsuspected $500 to the tally. And since I could not dig to the desired depth of 4 feet,  I decided to raise the pond 10 inches above the ground using pressure treated 2x10s to make a 12 inch wide raised box around the pond. So a couple of hundred dollars in wood and screws were added to the expenses. The rocks and hard ground also shaped my pond to 8×9 with a two foot deep plant shelf at one end with an average depth of 3 feet. My ideal 3000 gallon pond is now a mere 1600 gallons (or less).

I forgot to add in the price of rocks for my  waterfall and borders. + $450 including mortar and some black foam.

I decided to build an upper level bog rather than purchase a bead filter. The bead filters I wanted run about $800-$1000. The cost of the lumber, liner, and gravel came in around $300 for this addition. The bog is 5’x4′  and 2 feet deep. I am hoping this will replace the need for the bead filter once everything is running. I just learned about a prefilter which runs about $300 but will remove items larger than 30Microns.

So far my costs have totaled about $3300. I still haven’t seriously looked at pricing of plants yet, but that will be around $500 which can wait until spring.

UPDATE 1 year later: I learned too much from people who built ponds in the 1980s vs those who built ponds in the 2000s. I hope you will do more homework than I did and build a more adequate pond.

Posted in Pond 2010, Pond budget, Pond Building | Comments Off on The new Pond – The budget

So it begins

The first post on a new blog is always the hardest. You want to grab the attention of all your future readers but the ideas for the 2nd, 3rd, 4th and future posts are swirling around in your mind. So I will provide a brief history of how I came to write this pond journal and what I hope it can become.

I grew up in Florida surrounded by water. My father was an avid fisherman and was usually found near water most of his life. Growing up near a large river I learned early how to fish, catch crabs, and to swim.  We rarely went to the beach even though it was just a few minutes drive.  When we moved to Atlanta we would go hiking in the north Georgia mountains and see the fabulous waterfalls. Then in 2003 I purchased a house with a 400 gallon backyard pond comprised of two preformed shells.

It wasn’t long after we moved in that the pond became a fascination. Of course it turned green during the first warm days of spring. So I went and bought chemicals to kill the algae and managed to kill every other plant in the pond. After a water change and major clean up I visited the local pond store and got some water lilies and some hyacinth to try to revive my pond. But the algae would be a battle for two years.  Then one day I read about filtration and added a waterfall filter box with hundreds of scrubber pads to help filter the water. It was a dramatic improvement. So I added a couple of goldfish to the pond and sat back in amazement at how much entertainment those little fish provided.

I fed and visited with the fish every day and was more careful about the additives I used in the pond to help maintain its appearance. On one particular visit I was shocked to find that two fish had mysteriously disappeared. I assumed a local cat got them and thought nothing further about it. I went to the pond store and purchased a couple of fancier goldfish to replace them. A few days later there was only 1 fish. It wasn’t long before 1 fish was zero.

My mother-in-law decided we could not have a pond with out fish so she purchased 12 goldfish at the local pet store. These shy fish hid under rocks and plants and seemed not to disappear as rappidly as prior occupants. The even multiplied the next spring giving me about 30 fish in total. I gave them good places to hide and kept the water clean and clear as possible. Then one morning the dog was going ballistic at the back door. I looked out to see a 3 foot heron purched at the side of my lower pond where all the fish lived. AH HA. There is the culprit. Sure enough he had reduced me down to about 6 fish.  Over the next few weeks the heron returned and claimed all but 2 of the shyest  fish.

Then in the summer of 2010 I decided it was time to build a bigger pond that would allow me to keep Koi and be deep enough to keep the Heron away from them. Thus is the beginning of the adventure of building a new pond. I hope the following posts will help those in some small way to learn from my mistakes, successes, and endeavors in water gardening.

Posted in Pond News | Comments Off on So it begins

PondJournals.com Coming Soon

Coming in 2011, the adventures and tribulations on building and owning a pond.  Inspired by those who share their expertise in building techniques I will showcase my own approach. I will also share the stories that occur around the pond or because the pond was built.  My vision for this site is that it will attract other writers and journalists so we can build a major resource for future generations of pond enthusiasts.

See you soon.

Eric.

Posted in Pond 2010 | Comments Off on PondJournals.com Coming Soon